This is my version of a chalkboard refrigerator. I would not recommend doing this project with a brand new refrigerator! I thought of this project when our old fridge broke down and we bought a refurbished one. Here is my new fridge, the first one is how it is supposed to look.
As you can tell it does not have handles. This is how I got it so cheap.
Step 1
Gather Supplies
1 can of Rustoleum Magnetic Primer
1 can of Rustoleum Chalkboard Paint
1 roll of painters tape
1 roll of plastic drop cloth
2 small roller brushes
*Chalk*
Step 2
Get Started
Start by taping off any areas of the refrigerator that you don't want to paint. If you have an ice/water spout cover with plastic and tape off. Clean the fridge and dry thoroughly. Next apply the primer. I applied 2 coats of primer, letting the first one dry for about an hour and then I applied the second. Once the primer is dry completely you can apply the Chalkboard paint. Again I applied 2 layers of paint and then used a regular paint brush to touch up any areas. Let the paint dry for 24 hours before applying any chalk!
Step 3
Have fun and get creative!
Here are some examples of what I did.
This is Our Calendar. I use this space for important dates, appointments, and other things happening throughout the month. The magnets I used did not show up well on camera so I added in a few dates using photo shop to show you an example.
This is our Weekly Menu. You can also add on a shopping list or even a chore list!
My oldest son uses this space for his weekly Spelling Words.
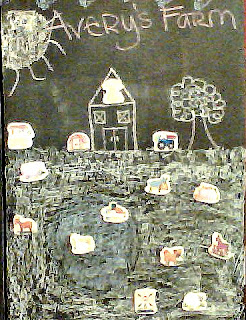
My 5 year old has an obsession with refrigerator magnets and so he loves to play make believe with them all. He has a few different collections but for this one I used his farm animals.
The Free Space is for the kids to draw whatever they want, they can even play tic-tac-toe!
This was one of the best projects I ever did and the kids love that they can draw on my fridge! I have realized with this one that you can use Chalkboard paint on nearly anything. The total amount spent on this project was $35. It was well worth it.
To clean the chalk off simply use any cleaner and a sponge. Dry thoroughly with a paper towel.


